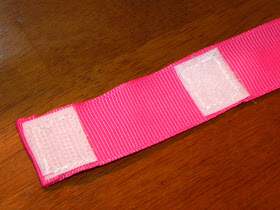
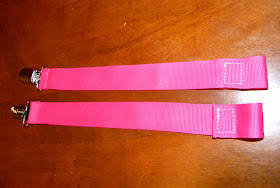
 This is a simple binkie leash/clip that takes about 15 minutes to make once you have all the supplies.
You will need:
11" of Ribbon about 1" wide
Velcro Strips or Circles
Fashion Fit Clip or Suspender Clip
Sewing Machine or Neddle & Thread
Lighter
First you trim the ends of your ribbon nice and straight if they aren't already and burn the ends with a lighter so they don't fray.
Next cut a square out of each of your velcro strips (the soft side and the rough side) so they're about 3/4" X 3/4".
 Fold the ribbon over a tiny bit (about 1/4") so the end will look nice and hemmed. Now sew the rough velcro square over that hem and all around the square. I just held the hem in place while I sewed but you can iron that edge down to make it easier while you sew. Make sure you sew the velcro on to the side of the ribbon that shows the burned edge.
 Now sew the soft velcro square to the ribbon about 2" from the rough velcro square. This is where you'll put the binkie.
 Now get out your clip. I bought this $4 "Fashion Fit Clip" and cut off the white elastic but suspender clips are only $2 for a set of 2. The difference is that this has rubber over the teeth and the suspender clips don't. You decide.
 Feed the side of the ribbon without velcro through the clip. Hold the edge of the ribbon over to make a little hem just like before then with your clip in place, sew the hemmed edge of the ribbon down to the ribbon to secure the clip. Again you can iron the hem to keep it in place but I just held it.
  I made 2 since I had 2 clips. Here they are together each showing a different side.
Done! You can use some super cute ribbon to spice it up and I think zig zag stitching would be cute too. Or instead of ribbon you can use fabric. What about a snap instead of velcro? The possibilities are endless! I just needed to hurry and make something pink so my daughter wouldn't have to use my son's blue one any longer!
Happy crafting :)
~Star